Pinata Makeovers are my favorite because it takes out the messy component (paper mache!) and you only do the fun part (decorating!) A pinata makeover is when you take an existing pinata, remove its fringe and remake it into something else by redecorating the base. It is an easy way to get a custom look. Today we made a lollipop! See the whole post as well as the “before” photos below. See our other pinata makeovers right here.
Image may be NSFW.
Clik here to view.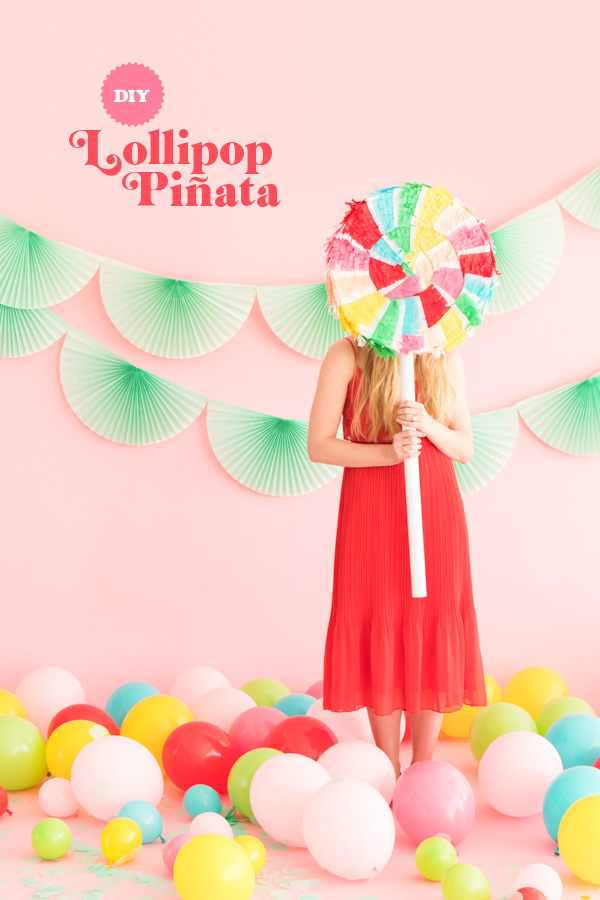
We started with this balloon pinata and defringed it. (Sorry little pinata!) Then we added fringe in our favorite rainbow colors and finished it off with a cardboard tube to make the sweetest, cutest pinata ever.
Image may be NSFW.
Clik here to view.
Image may be NSFW.
Clik here to view.
Image may be NSFW.
Clik here to view.
Image may be NSFW.
Clik here to view.
Image may be NSFW.
Clik here to view.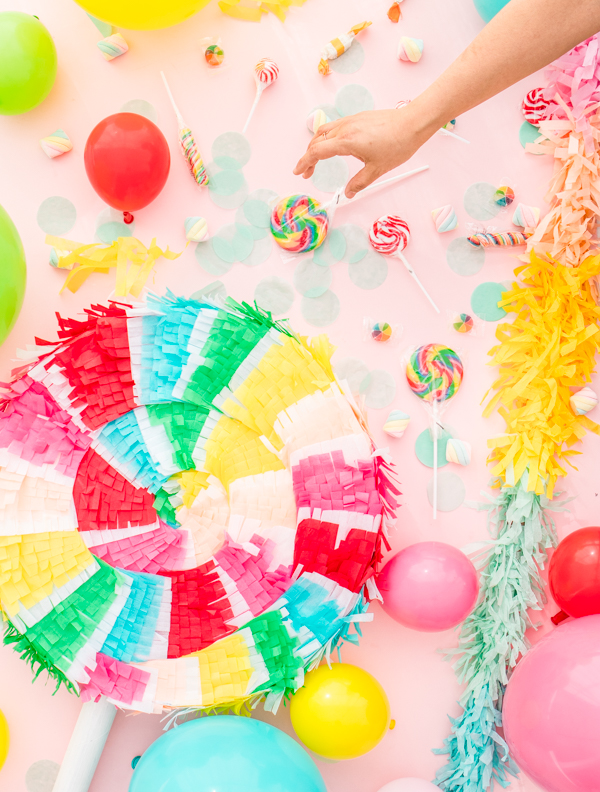
Image may be NSFW.
Clik here to view.
Materials needed: Round pinata, cardboard wrapping paper roll, gesso, paintbrush, pencil, tissue paper (in honeysuckle, mandarin red, peach, buttercup, kelly green, bright turquoise, white), scissors, hot glue gun
Step 1: De-fringe the pinata.
Step 2: Paint the pinata base and wrapping paper roll with a coat of gesso and let dry. Once dry, draw a large spiral on both sides of the white pinata base in pencil.
Step 3: Cut a hole at the bottom of the pinata that is the width of the wrapping paper roll. Insert the roll and secure all sides with hot glue.
Step 4: Cut fringe in a bunch of colors with a good pair of scissors. Our fringe was roughly 2″ tall and 1 cm wide.
Step 5: Starting at the center of the spiral, hot glue fringe to the pinata, making sure to maintain the circular shape of the spiral. Alternate colors in rainbow order, and add a few layers of white fringe between each color. Repeat for the other side.
Step 6: Fringe the outer edge to match the color pattern of one of the pinata sides.
Step 7: Fill your pinata with treats. Hang it up, and give it a whirl!
Image may be NSFW.
Clik here to view.
Image may be NSFW.
Clik here to view.
Photography & styling by Naomi Julia Satake
Crafting by Justine Pon
